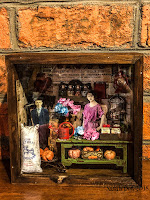
Posts

Showing posts from 2018

Robot Vignette Box

Image
Hi everyone! I have had numerous requests for a tutorial for my Robot Vignette Boxes. I finally have had some much needed down time from classes to get this done. Here is the step by step process to these adorable little boxes. I took apart the latches on my unfinished wood box and used two different types of paint. The first paint applied is Tim Holtz Distress Paint in Black Soot. Once dried, the second paint I applied directly over the Distress Paint is FolkArt Extreme Glitter Paint in Black. Once dried it gives a really cool glitter effect that makes the box pop. The second step is to gather all the pieces: 1-Tim Holtz Adornments Foundry (Electric), 2-Tim Holtz Mini Gears (Used as base under Hardware Pull), 2-Tim Holtz Pulley Wheels, 1- Tim Holtz small Configuration Box Insert (Smallest Size Square Box), 1-Tim Holtz Mini Hardware Pull, 1-Tim Holtz Light Bulb (Retired), 1-Rectangular Wood Piece (Robot Head), Tim Holtz 3D Gear Embossing Folder, 1-Sheet of Tim H

Garden Themed Shadow Box

Image
Hi everyone! Since spring is right around the corner I wanted to share my garden themed shadow box. I have been obsessed with Shadow Boxes since I was a young girl. I love to create vintage that tell scenes tell a story. Tim Holtz’s Paper Dolls make it easy to bring these boxes to life. I started with an unfinished wood shadowbox and used Tim Holtz Distress Stain in Gathered Twigs and Espresso. By using the two combined colors, I was able to create a contrasting color that pops. Next, I used crackle paint and Ranger Dylusions paint to get the desired color. I wanted a weathered green to go with the garden theme of the box.   For the paper portion of my shadowbox: I used Tim Holtz Memoranda paper for the background and distressed it with his  Distress Crayons and Ink in Vintage Photo and Walnut. I colored the Paper Dolls using Seedless Preserves, Blueprint Sketch, and Black Soot Distress Crayons. Lastly, I used Tim Holtz Mermaid Lagoon Distress Spray Stain