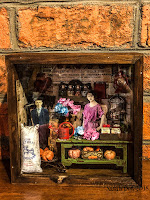
Robot Vignette Box

Hi everyone! I have had numerous requests for a tutorial for my Robot Vignette Boxes. I finally have had some much needed down time from classes to get this done. Here is the step by step process to these adorable little boxes.

I took apart the latches on my unfinished wood box and used two different types of paint. The first paint applied is Tim Holtz Distress Paint in Black Soot. Once dried, the second paint I applied directly over the Distress Paint is FolkArt Extreme Glitter Paint in Black. Once dried it gives a really cool glitter effect that makes the box pop.

The second step is to gather all the pieces:
1-Tim Holtz Adornments Foundry (Electric), 2-Tim Holtz Mini Gears (Used as base under Hardware Pull), 2-Tim Holtz Pulley Wheels, 1- Tim Holtz small Configuration Box Insert (Smallest Size Square Box), 1-Tim Holtz Mini Hardware Pull, 1-Tim Holtz Light Bulb (Retired), 1-Rectangular Wood Piece (Robot Head), Tim Holtz 3D Gear Embossing Folder, 1-Sheet of Tim Holtz Metallic Gold Paper, 2-Tim Holtz Numerics (25), 2-Craft Wood Dowel Pieces (Arms), 3-Hardware Pieces (For mouth and eyes), 1 small Hex Bolt (neck piece), Tim Holtz Distress Paint in Brushed Pewter (to paint robot) and Black Soot (to paint wood box), and Folk Art Extreme Glitter Paint in Black (topcoat on wood box), and 1- unfinished wood box 6 1/2” x 4 1/2” x 2”
*The craft wood pieces for this project were purchased from Hobby Lobby
*The eyes and mouth piece can be various hardware pieces but what I found that fits the best for this particular project is Paper Craft Fasteners that resemble screws. Michaels sells these for $1.99
*The wood box was purchased at AC Moore Craft Store for $2.99 (6 1/2” x 4 1/2” x 2”)

The third step is to cut the 3D embossed paper to size and glue it to the inside back of the box. For papercrafting I normally use Tim Holtz Collage Medium however, due to the texture and raised areas, I chose an adhesive. (I use Aleene’s The Ultimate Adhesive purchased at Michaels for $6.99)


The Fourth Step is painting and assembling the robot. I used Tim Holtz Distress Paint in Brushed Pewter on the wood pieces and the Tim Holtz Small Configuration Box. Once dried, I glued a small piece of the 3D Embossing Gear Paper to fit the size of the Small Configuration Box. (I used the same adhesive I mentioned in step three for entire project) I used the Tim Holtz Craft Pic to make the holes to screw in Pulley Wheels. I then began attaching the head to the tiny hex bolt then attaching it to the box. Next, I glued the arms, light bulb, and the electrical adornment w/fasteners to the box. Finally, I glued the eyes (used fastener’s) .

The last step was gluing the handle and the numerics on the box. I used Tim Holtz Mini Gears under handle for a cool steampunk look. Here is the completed piece! I hope you like the finished product! Thanks for stopping by!

This is very educational content and written well for a change. It's nice to see that some people still understand how to write a quality post.! Ultra Shore
ReplyDelete